
Kyocera Set-Up Guide
Be Smart. Use a Dumbphone.
Table of Contents
Before You Buy
Before You Turn it On
Navigating the Phone
Inital Steps
Getting Apps
Installing Apps
Debloating
Bonus Tips
Customization
Final Words
~Sources~
Before You Buy
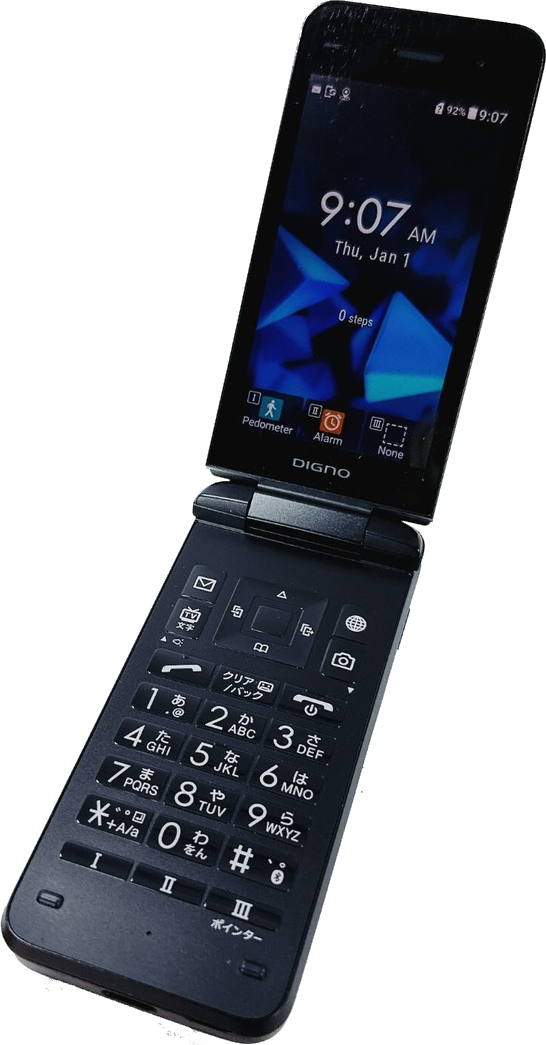
NOTE: This guide was based off of my experience with a Kyocera 902KC. Other Kyocera phones are similar, but obviously have their differences. Keep that in mind going forward.
Make sure the phone you're buying is unlocked. If it's not, it is possible to do yourself, but I know nothing about that, so you'll need to find another guide.
The only cell carriers that allow Japanese Keitais in America are T-Mobile and Mint Mobile. Your phone will not connect if you try using another carrier.
Each phone will connect to different bands from cell towers. Make sure to check the coverage around you to make sure the phone you're buying has coverage near you. Even two different 902KC's might connect to different bands depending on the Japanese provider it came from. You can use this map to check the tower and coverage around you. If you bought a 902KC from Kyoex like I did, the 4G bands that are covered are 1, 3, 5, 12.
Before You Turn it On
The first thing you should do is put in your SIM card, and micro SD card if you plan on using one. You really only need an SD card if you plan on adding music to it, or like... filming a BUNCH of vlogs idk.
Pop off the back cover of the phone (your fingernail should suffice) from the little notch on the bottom of the phone.
Remove the battery from the arrow icon at the top.
DO NOT REMOVE THE STICKER! There should be a little yellow plastic thing at the bottom. Use the tab in the center of it to pull it up, and you can then slide the SIM card and SD card into place from the opening it makes. Make sure to push them in all the way.
Close the tab, put the battery back in, and power up the phone.
![]() Congratulations, your phone is no longer a paperweight!
Congratulations, your phone is no longer a paperweight! ![]()
Navigating the Phone
The main navigation is done by using the D-Pad, with the center square button being Select, as well as opening the main menu from the Home screen. Each D-Pad direction also has it's own use as well:
| Up🠉 | Tap once for widgets, twice for notifications |
| Right🠊 | Call history (Outgoing) |
| Down🠋 | Contacts |
| Left🠈 | Call history (Incoming) |
The 4 buttons surrounding the D-Pad are the F-Keys and are self-explanatory (and mostly useless):
| Letter (F1) | Default messaging & email app (Sucks) |
| Globe (F2) | Internet (This ones alright) |
| TV (F3) | TV (Only works in Japan) |
| Camera (F4) | Camera (This one is good) |
The next row has a few uses:
| Left (Slanted Phone) | Call/Left option select |
| Middle (Japanese) | Back button |
| Right (Flat phone) | Power (hold)/Exit/Right option select |
The number keys function as the keyboard. To type different letters, you need to hit the key multiple times (ie. Once for A, twice for B, thrice for C in quick succession). The only exceptions to this rule are that 0 is the spacebar, and 1 is period/symbols.
And finally, the last row of roman numerals are your Custom Keys. These you can bind to whatever you want for quick access.
Initial Steps
Language & Developer Mode
Your phone might come in Japanese depending on where you got it. If it does, follow this path:
Square Button > Settings (Wrench) > Last option > 7th down (言語)
To move forward, your phone will need to be in Developer Mode. This can be turned on by going to:
Settings > More settings > Developer options > Developer options [check this]
Setting up Vysor
[ Download ]
Download & install Vysor, and boot it up. (Windows users will also need to install these drivers)
Plug your phone into your computer with a USB-C cable. Click "Allow" on the pop-up. You should now be able to control the phone from your computer. This will allow us to do things much faster. (It will also allow us to do some things that we, for some reason, can't do on the actual phone! More on that later.)
APN Settings
(If you ever need your IMEI number, the quickest way to find this is to dial *#06#)
Open up Settings > Wireless/Network > Cellular networks > Access Point Names.
Click Menu, and "New APN". Then, click on the link below depending on which carrier you have.
Mint Mobile //
T-Mobile
(For T-Mobile, scroll down to "Manually input data settings" and open "Android guide")
Literally just copy and paste from the site into Vysor.
(Obvious Note: Don't copy or enter anything for the sections that say <Not set> for T-Mobile and (leave blank) for Mint Mobile)
![]() Congratulations, you now have 4G data!
Congratulations, you now have 4G data! ![]()
Getting Apps
Important Notes
Make sure to not download .apk's past your phone's Android version. The 902KC, for example, runs Android 8.1.1. So anything newer than that will not work.
These phones can ONLY run .apk files. Not .xapk, .apkm, or anything else. Only .apk.
Below I've made a chart of the apps I recommend and where to get them. The easiest way is to use the "app stores" F-Droid and Aurora (these are all free). To use this method, you would only have to manually install F-Droid, use that to install Aurora, and then download the rest from one of these 2.
If you want to manually install them instead, that's perfectly fine. I've included direct links to download the .apk's in the tables by clicking on the app name. You will have to manually download the new .apk each time a new version comes out if you want to update it, however. If you do decide to manually install them but later decide you want an easier way to update, you can still update and even uninstall the apps from one of the appstores (granted the app store has that app in it's library).
Recommended Apps
App Stores
| App | Description | App Store? |
|---|---|---|
| F-Droid | App store | - |
| Aurora Store | App Store | F-Droid |
Utility
| App | Description | App Store? |
|---|---|---|
| QKSMS | Better messaging app | Aurora |
| International messaging | Aurora | |
| K-9 Mail | F-Droid, Aurora | |
| Clima | Weather | F-Droid |
| Traditional T-9 (TT9) | Better predictive text | F-Droid, Aurora |
| Key Mapper | Allows rebinding keys | F-Droid, Aurora |
| QR & Barcode Scanner | Duh | F-Droid |
| Waze | GPS Navigation/Maps | Aurora |
Entertainment
| App | Description | App Store? |
|---|---|---|
| Discord | Messaging gamerz | Aurora |
| NewPipe | YouTube viewer | F-Droid |
| Musicolet | Music player (requires actual files) | Aurora |
Websites to use
Uptodown - Shows versions and file type (Hit the "Older Versions" button). I recommend this first since these phones can only use .apk files, not .xapk or .apkm, which most newer versions are.
APKMirror - For certain apps like discord, Uptodown only has the most recent version (which happens to be an .xapk). You have to crawl through the different downloads and find one that doesn't say "bundle".
Installing Apps
ADB Fastboot
IMPORTANT!! When you install this, make sure to make a desktop shortcut. This gives quick access to the application AND folder by right-clicking and hitting "Show file location". If you already skipped this, no worries. The default location is "C:\Program Files (x86)\Minimal ADB and Fastboot".
Open the shortcut/cmd-here.exe, and the command prompt will come up. In the command prompt, type adb devices and hit enter. If your phone asks you to allow something again, hit allow.
Under "List of devices attached" in the console, you should see a string of numbers and then "device"
(ex. 803710853486 device)
If you instead see "unauthorized", simply enter in adb devices again.
![]() Congratulations, you can now install & manage apps!
Congratulations, you can now install & manage apps! ![]()
Installing the .apk's
To install an .apk file, it needs to be in the ADB Fastboot folder (default C:\Program Files (x86)\Minimal ADB and Fastboot or right-click your ADB Fastboot shortcut and do "Show file location"). I recommend renaming it something easy, like appname.apk.
Open the application if it isnt already (and make sure your phone is connected using adb devices), and enter in adb install xxx.apk, obviously swapping out xxx for your .apk name.
You should see "Success" in the prompt. If you don't, make sure you spelled everything right.
ADB Useful Commands
adb devices - starts connection (you will need to run this every time you open ADB Fastboot)
adb shell pm list packages -3 - shows installed apps
adb install xxx.apk - installs the apk file (change the xxx to whatever your file is named)
adb uninstall com/org/whatever.blah.blah - uninstalls the apk file (use the second-listed command to see the full names. Ex. adb uninstall com.moez.QKSMS)
More Notes
I BELIEVE that updating from one of the App stores will allow you to get newer versions than the most recent .apk (so like even the .apkm's and stuff). So the strat manually install it, and then update it from the app store. I'm not aware of this breaking app's (aside from Waze. More on that in a bit.) but that's always a possibility.
The most recent .apk I found for Discord was the version from June 25, 2024. This is already linked above in the table.
The most recent Waze .apk doesn't work for some reason, so you need to get an older version. I would recommend not updating Waze on Aurora for this reason. This is also the same link as above in the table.
For K-9 Mail, most email providers allow you to simply log in, but for GMail you'll need to go into the custom settings and change it from OAuth 2 to Normal Password, generate an app password on Google, and use that.
In Key Mapper, some hotkeys require special permissions. If it gives you an error, try going back into ADB Fastboot, ensure your phone is connected by using adb devices, and then paste this in:
adb shell pm grant io.github.sds100.keymapper android.permission.WRITE_SECURE_SETTINGS
Musicolet's sorting by default includes "the" (So like The All-American Rejects would be under "T" for The, not "A" for All). I dislike that. If you want to fix that, open the app, hit the 3 dots > Settings > Advanced > Ignore certain words at beginning while sorting (Alllll the way down) > Apply this setting for these tags > Album, Artist.
LINE and Spotify Lite don't work at all, so don't bother trying.
![]() Congratulations, your phone is now somewhat usable!
Congratulations, your phone is now somewhat usable! ![]()
Debloating
[ Download ]
Debloating is a little more advanced. This is not necessary at all, and just helps a little bit on freeing up some space, saving on battery life, and possibly even speeding up your phone. If you are interested in this, follow these steps:
Download Universal Android Debloater
Drag the installer into your Minimal ADB and Fastboot Folder (default is "C:\Program Files (x86)\Minimal ADB and Fastboot")
Open the uad_gui-windows.exe (Make sure your phone is turned on and unlocked)
Go to this link and select the ones you are comfortable getting rid of
Hit "Uninstall selection" at the bottom
NOTE: It might be a good idea to take note of everything you uninstall, so if something goes wrong you can reinstall them.
Bonus Tips
Change Menu Screen to custom layout
Square > Menu > Layout > Last option (dotted lines)
The second row middle column is where it'll start, so plan around that.
To add a new shortcut, just click one of the blank spaces.
Hidden Menu
In Vysor, click and drag the top bar down on the home screen and click the gear icon and then open the Display settings. Here, you can change a few settings that aren't found anywhere else, and you literally cannot access this menu via the actual phone for some God-forsaken reason.
From ONLY this menu you can access:
Night Light - Screen yellowing during evening hours
Auto-rotate screen - Automatically rotates the screen when your phone is held sideways (in advanced)
Font size - Changes font size. I changed this from Largest to Large. Anything smaller is pretty tiny (Note on this below). I also tried changing Display size to small, but it makes a lot of things look really janky so I'd recommend keeping that where it is.
Other recommended settings
Sleep Timer (Settings > Wallpaper/Display > Backlight time) - Changed to 2 minutes instead of the default 30 seconds
Font Size (Settings > Wallpaper/Display > Font size) - Yeah, I know. "You already went over font size in the hidden menu!" Well apparently, theres two different font size settings. I'm not sure if they control different things, or work additively or what. But my ideal setting for THIS one is Small.
Volumes (Settings > Sound/Notification > Volume) - I maxed both the Alarm and Ring so they can actually do what they need to do. I also recommend maxing the in-call volume, as even at max it's pretty quiet.
Hide Custom Key bar (Settings > Custom key > Display on Home screen [unchecked]) - This is just a personal preference. I think the bar is ugly and I like seeing my wallpaper more. You memorize them quickly anyway.
Home display widgets
You can change the Home screen widgets by moving up on the home screen and clicking the square button. This works in a grid based pattern, where the screen is 5 blocks tall and 4 blocks wide. My current setup is Digital Clock Large, Daily Calendar, and then a Musicolet widget just titled Advanced.
(NOTE: When making a calendar event, set Reminder Notification to “start time”. If you leave it as is, it will send you a reminder on the night before the actual event, not at the time of the event.)
Key Mapper settings
These are the remappings I set in Key Mapper
Note: The F-Keys can be found here
DNR - Do Not Remap
RUR - Repeat Until Released
| Trigger | Actions | Constraints |
|---|---|---|
| Long press F4 | Toggle flashlight | Device is locked |
| Long press F1 (DNR) | Toggle auto-brightness | - |
| Camera (DNR) | Switch to Traditional T9 | |
| Double press Camera (DNR) | Switch to iWnn IME | |
| Long press F2 | Play/Pause media playback | Device is locked |
| F2 | Volume up | Musicolet is in foreground |
| F4 | Volume down | Musicolet is in foreground |
| F2 | Volume up | Device is locked |
| F4 | Volume down (RUR) | Device is locked |
![]() Congratulations, your phone is now really usable!
Congratulations, your phone is now really usable! ![]()
Customization
Custom files can be added via connection to your PC, or by putting them onto a micro SD card.
The dimensions for wallpapers are 540 x 964.
Custom ringtones and text tones can be .mp3 files. No need to convert them to anything weird like iPhones or old phones.
![]() Congratulations, your phone now looks (and sounds) pretty!
Congratulations, your phone now looks (and sounds) pretty! ![]()
Final Words
NOTE: I am not a tech guru. This guide is an amalgamation of various YouTube videos, reddit posts, and other guides that I've found around the internet. I will most likely not be of much help if you happen to run into any issues, unfortunately. I am not responsible if you brick your phone.
If you have anything you think I should add, or noticed any incorrect information, please let me know! Email me at karasushima@proton.me. Thank you for reading and I hope this helped!
Sources:
Kyocera 902kc setup guide - YouTube video with most of the basics for installing .apk's
Kyocera Digno 3 902kc Advice - Reddit thread with random tips
Debloating question Kyocera 902kc/903kc - Reddit thread about debloating. Has a very nice list of what seems safe to delete.
Some Tips and Tricks for the Kyocera 902KC! - Reddit thread with ideas for Key Mapper and a bunch of other random tips